Beyond Takeout: How to Make Classic Honey Chicken in Under 30 Minutes
Tired of the endless takeout cycle but craving that irresistible sweet, savory, and perfectly crispy homemade honey chicken experience? You're in luck! This isn't just another recipe; it's your definitive guide to whipping up a batch of glorious, finger-licking honey chicken that rivals any restaurant – and the best part? It comes together in under 30 minutes. Forget the deep fryer, the long waits, and the questionable ingredients. We're about to unlock the secrets to golden-glazed perfection right in your kitchen, transforming humble chicken into a weeknight hero or a surprising dinner party star.The Allure of Homemade Honey Chicken (and Why It Beats Takeout)
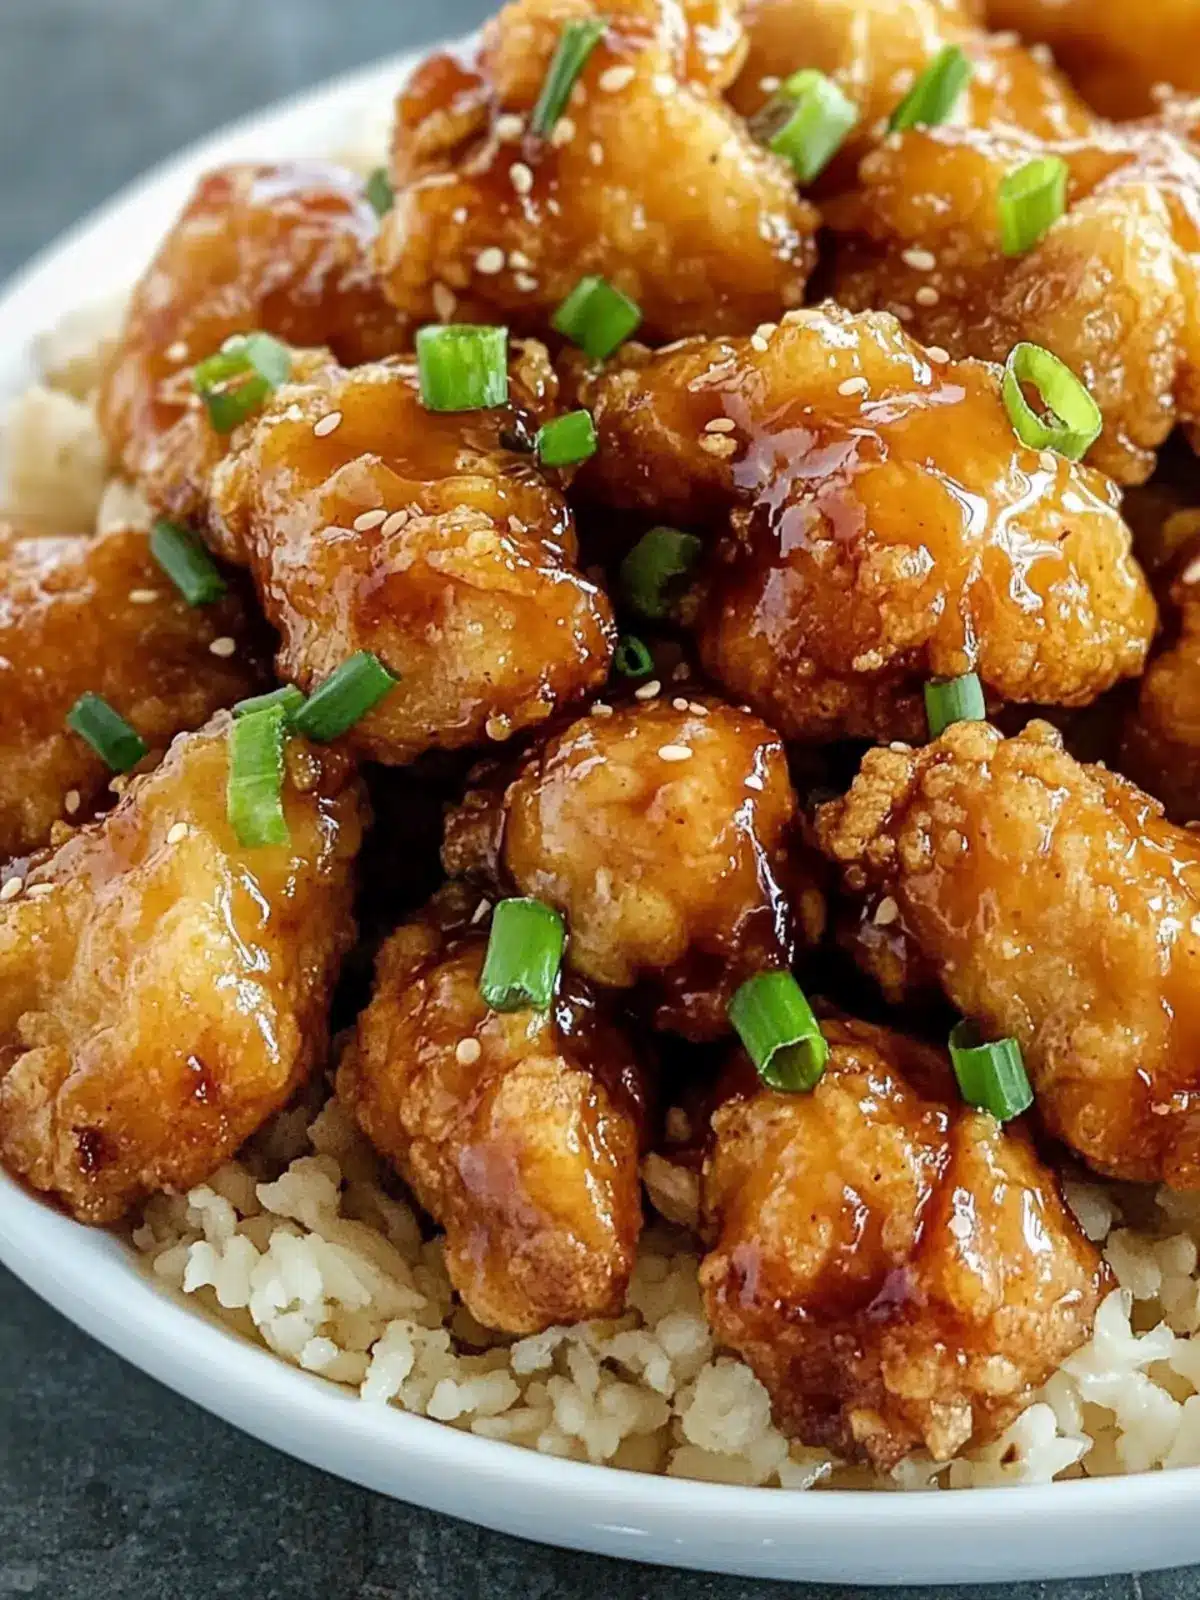
There's something uniquely comforting about honey chicken. Perhaps it's the nostalgic blend of sticky sweetness meeting a savory punch, or the satisfying crisp texture of perfectly cooked chicken. For many, it evokes memories of cherished family meals or the ultimate indulgent treat. The aroma alone, a warm symphony of garlic, soy, and caramelized honey, is enough to get stomachs rumbling. While takeout versions are convenient, they often come with a heavy dose of oil and preservatives. Making honey chicken at home gives you complete control. You choose the quality of your ingredients, decide on the level of sweetness or heat, and can achieve a superior texture without the greasiness of deep-frying. Moreover, the sheer satisfaction of creating such a delicious meal from scratch, in less time than it takes to get delivery, is a reward in itself. This versatile dish can elevate a simple rice bowl, become the star of a quick lunch, or impress guests at a casual gathering.Cracking the Code: Essential Ingredients for Your 30-Minute Masterpiece
The beauty of classic honey chicken lies in its simplicity. You don't need a pantry full of exotic spices; just a handful of staple ingredients, artfully combined, create that signature taste and texture.- The Chicken: For speed and tenderness, boneless, skinless chicken is key.
- Chicken Breasts: Cut into 1-inch pieces, they cook exceptionally fast, making them ideal for our 30-minute goal.
- Chicken Thighs: While slightly richer in flavor and less prone to drying out, they may require an extra minute or two of cooking time. Either works wonderfully, so choose your preference!
- The Golden Glaze Core:
- Honey: The star of the show, providing natural sweetness, viscosity, and that beautiful amber hue when caramelized. It's crucial for the sauce's signature stickiness.
- Soy Sauce: This brings the essential savory, umami depth and a salty balance to the sweetness of the honey. Use a low-sodium version if you're watching salt intake.
- Garlic: Freshly minced garlic is non-negotiable. It infuses the sauce with an aromatic pungency that perfectly complements the other flavors.
- The Unsung Hero – Cornstarch: This is perhaps the most critical ingredient for achieving that authentic sticky, crispy texture. When tossed with the chicken, it forms a light coating that crisps up beautifully during searing, creating a crust for the glaze to cling to. It also acts as a thickener for the sauce, ensuring it becomes glossy and luscious rather than watery.
- Flavor Amplifiers (Optional, but Highly Recommended):
- Rice Vinegar: A splash brightens the sauce, cutting through the richness and adding a subtle tang.
- Fresh Ginger: Grated ginger introduces a warm, zesty note that elevates the overall aroma and depth.
- Toasted Sesame Oil: A drizzle at the end imparts a wonderfully nutty, aromatic finish that deepens the Asian-inspired flavor profile.
- Crushed Red Pepper Flakes: For those who enjoy a hint of heat, a pinch or two adds a welcome kick without overwhelming the dish.
The Secret to Success: Mastering the Honey Chicken Technique
Achieving that perfect, restaurant-quality sticky honey chicken glaze in under 30 minutes is all about technique. It's not complicated, but following these steps ensures optimal flavor and texture.- Prep the Chicken for Perfection:
- Cut your boneless, skinless chicken (thighs or breasts) into uniform 1-inch bite-sized pieces. Consistency helps them cook evenly.
- In a bowl, toss the chicken pieces generously with cornstarch, a pinch of salt, and black pepper until each piece is lightly coated. This cornstarch coating is the magic touch for that desirable crisp exterior and ensures the sauce adheres perfectly.
- Sear for Golden Glory:
- Heat a heavy-bottomed skillet – a cast-iron pan is ideal – over medium-high heat. Add 1-2 tablespoons of a neutral oil (like vegetable, canola, or grapeseed). You want enough oil to coat the bottom, but not so much that you're deep-frying. This is our shallow-fry step for crispiness.
- Once the oil shimmers, add the chicken in a single layer, ensuring not to overcrowd the pan. Cooking in batches might be necessary to prevent the temperature from dropping, which would steam the chicken instead of searing it.
- Let the chicken cook undisturbed for 3-4 minutes per side, or until beautifully golden brown and crispy. Resist the urge to stir constantly; a good sear requires contact with the hot pan.
- Once cooked through and golden, remove the chicken from the skillet and set aside.
- Whip Up the Glorious Glaze:
- While the chicken cooks, whisk together your sauce ingredients in a small bowl: honey, soy sauce, minced garlic, and any optional enhancers like rice vinegar, grated ginger, or red pepper flakes.
- Bring It All Together:
- With the chicken removed, briefly wipe out any excess oil or burnt bits from the skillet, leaving just a thin film.
- Pour the prepared sauce into the hot skillet. Bring it to a gentle simmer, stirring constantly. The sauce will begin to thicken and become glossy almost immediately, thanks to the honey. This usually takes just 1-2 minutes.
- Return the seared chicken to the skillet. Toss vigorously to coat every piece evenly with the sticky, bubbling glaze. Cook for another 1-2 minutes, allowing the sauce to truly cling to the crispy chicken.
- Remove from heat, drizzle with a touch of toasted sesame oil (if using), and garnish with sesame seeds or chopped green onions for a fresh finish.
Pro Tips for Perfection
- Don't Overcrowd the Pan: This is worth repeating! Overcrowding lowers the pan temperature, leading to steamed chicken instead of crispy, seared pieces. Work in batches if necessary.
- Fresh is Best: While garlic powder can work in a pinch, fresh garlic and ginger will dramatically elevate the flavor profile.
- Taste and Adjust: Before adding the chicken back, taste your sauce. Need more sweetness? Add a touch more honey. Too sweet? A tiny splash of rice vinegar can balance it. Want more heat? Stir in extra red pepper flakes.
- Serving Suggestions: Classic honey chicken shines over a bed of fluffy white rice or brown rice, with a side of steamed broccoli, stir-fried bell peppers, or garlic green beans. It’s also fantastic in lettuce wraps or as a slider filling.
- The Shallow-Fry Advantage: Our method provides all the crispiness of deep-frying without the mess, excessive oil, or health concerns. The cornstarch coating ensures a beautiful crust, making it a healthier and quicker alternative.
Frequently Asked Questions About Your Speedy Honey Chicken
Here are answers to some common questions that pop up when making this beloved dish:
- Is sticky honey chicken spicy?
Traditionally, classic honey chicken is sweet and savory, with minimal heat. However, it's incredibly easy to customize! Add a generous pinch of crushed red pepper flakes to the sauce for a subtle kick, or stir in a teaspoon of sriracha for more pronounced spice.
- Can I use maple syrup instead of honey?
While maple syrup can provide sweetness, it's not a direct substitute for honey in this recipe. Honey has a thicker consistency and a distinct floral note that contributes significantly to the sauce's signature stickiness and caramelization. Maple syrup is thinner and has a different flavor profile; using it will result in a less viscous, less "sticky" glaze and a different taste. For the authentic experience, honey is best.
- Can this be made ahead for meal prep?
Absolutely! Honey chicken holds up well. Prepare a larger batch and store it in airtight containers in the refrigerator for up to 3-4 days. It reheats beautifully in the microwave or on the stovetop, though the chicken might lose some of its initial crispiness.
- What are the best side dishes?
The beauty of honey chicken is its versatility. Serve it with classic steamed jasmine rice or brown rice, quinoa, or noodles. For vegetables, try steamed or stir-fried broccoli, asparagus, green beans, or a simple side salad.
